Netzwerkfehler simulieren
Diese Seite wurde von PageTurner AI übersetzt (Beta). Nicht offiziell vom Projekt unterstützt. Fehler gefunden? Problem melden →
Dieses Dokument beschreibt, wie Sie mit NetworkChaos in Chaos Mesh Netzwerkfehler simulieren können.
Einführung in NetworkChaos
NetworkChaos ist eine Fehlerart in Chaos Mesh. Durch die Erstellung eines NetworkChaos-Experiments können Sie ein Netzwerkfehlerszenario für einen Cluster simulieren. Derzeit unterstützt NetworkChaos folgende Fehlertypen:
-
Partition: Netzwerktrennung und -segmentierung.
-
Net Emulation: Schlechte Netzwerkbedingungen wie hohe Latenz, hohe Paketverlustrate, Paketumordnung usw.
-
Bandwidth: Begrenzung der Kommunikationsbandbreite zwischen Knoten.
Hinweise
Vor dem Erstellen von NetworkChaos-Experimenten stellen Sie bitte Folgendes sicher:
-
Während der Netzwerkinjektion muss die Verbindung zwischen Controller Manager und Chaos Daemon funktionieren, da der NetworkChaos ansonsten nicht wiederhergestellt werden kann.
-
Für die Simulation von Net Emulation-Fehlern muss das NET_SCH_NETEM-Modul im Linux-Kernel installiert sein. Bei CentOS können Sie das Modul über das kernel-modules-extra-Paket installieren. Die meisten anderen Linux-Distributionen haben dieses Modul standardmäßig bereits installiert.
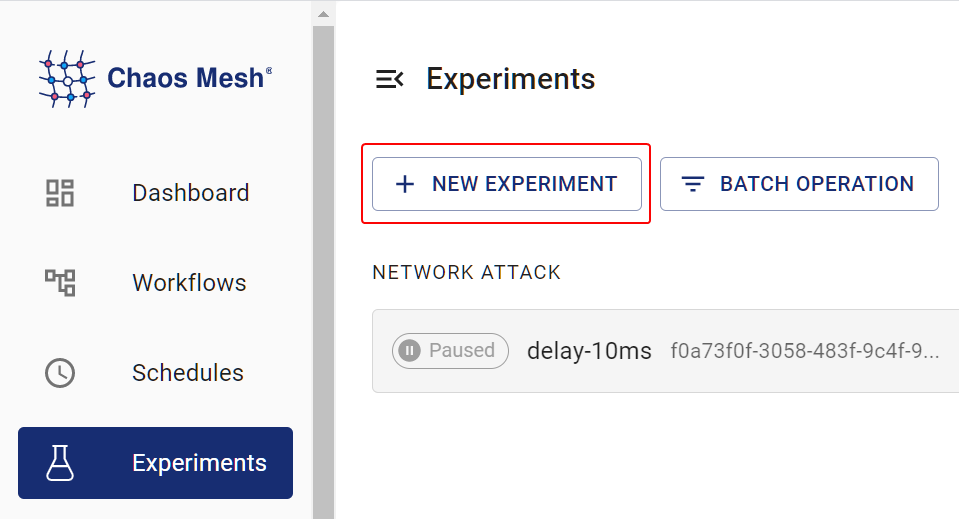
Experimente mit Chaos Dashboard erstellen
-
Öffnen Sie Chaos Dashboard und klicken Sie auf NEW EXPERIMENT, um ein neues Experiment zu erstellen:
Create Experiment -
Wählen Sie im Bereich Choose a Target die Option NETWORK ATTACK und ein spezifisches Verhalten wie LOSS. Füllen Sie dann die spezifische Konfiguration aus.
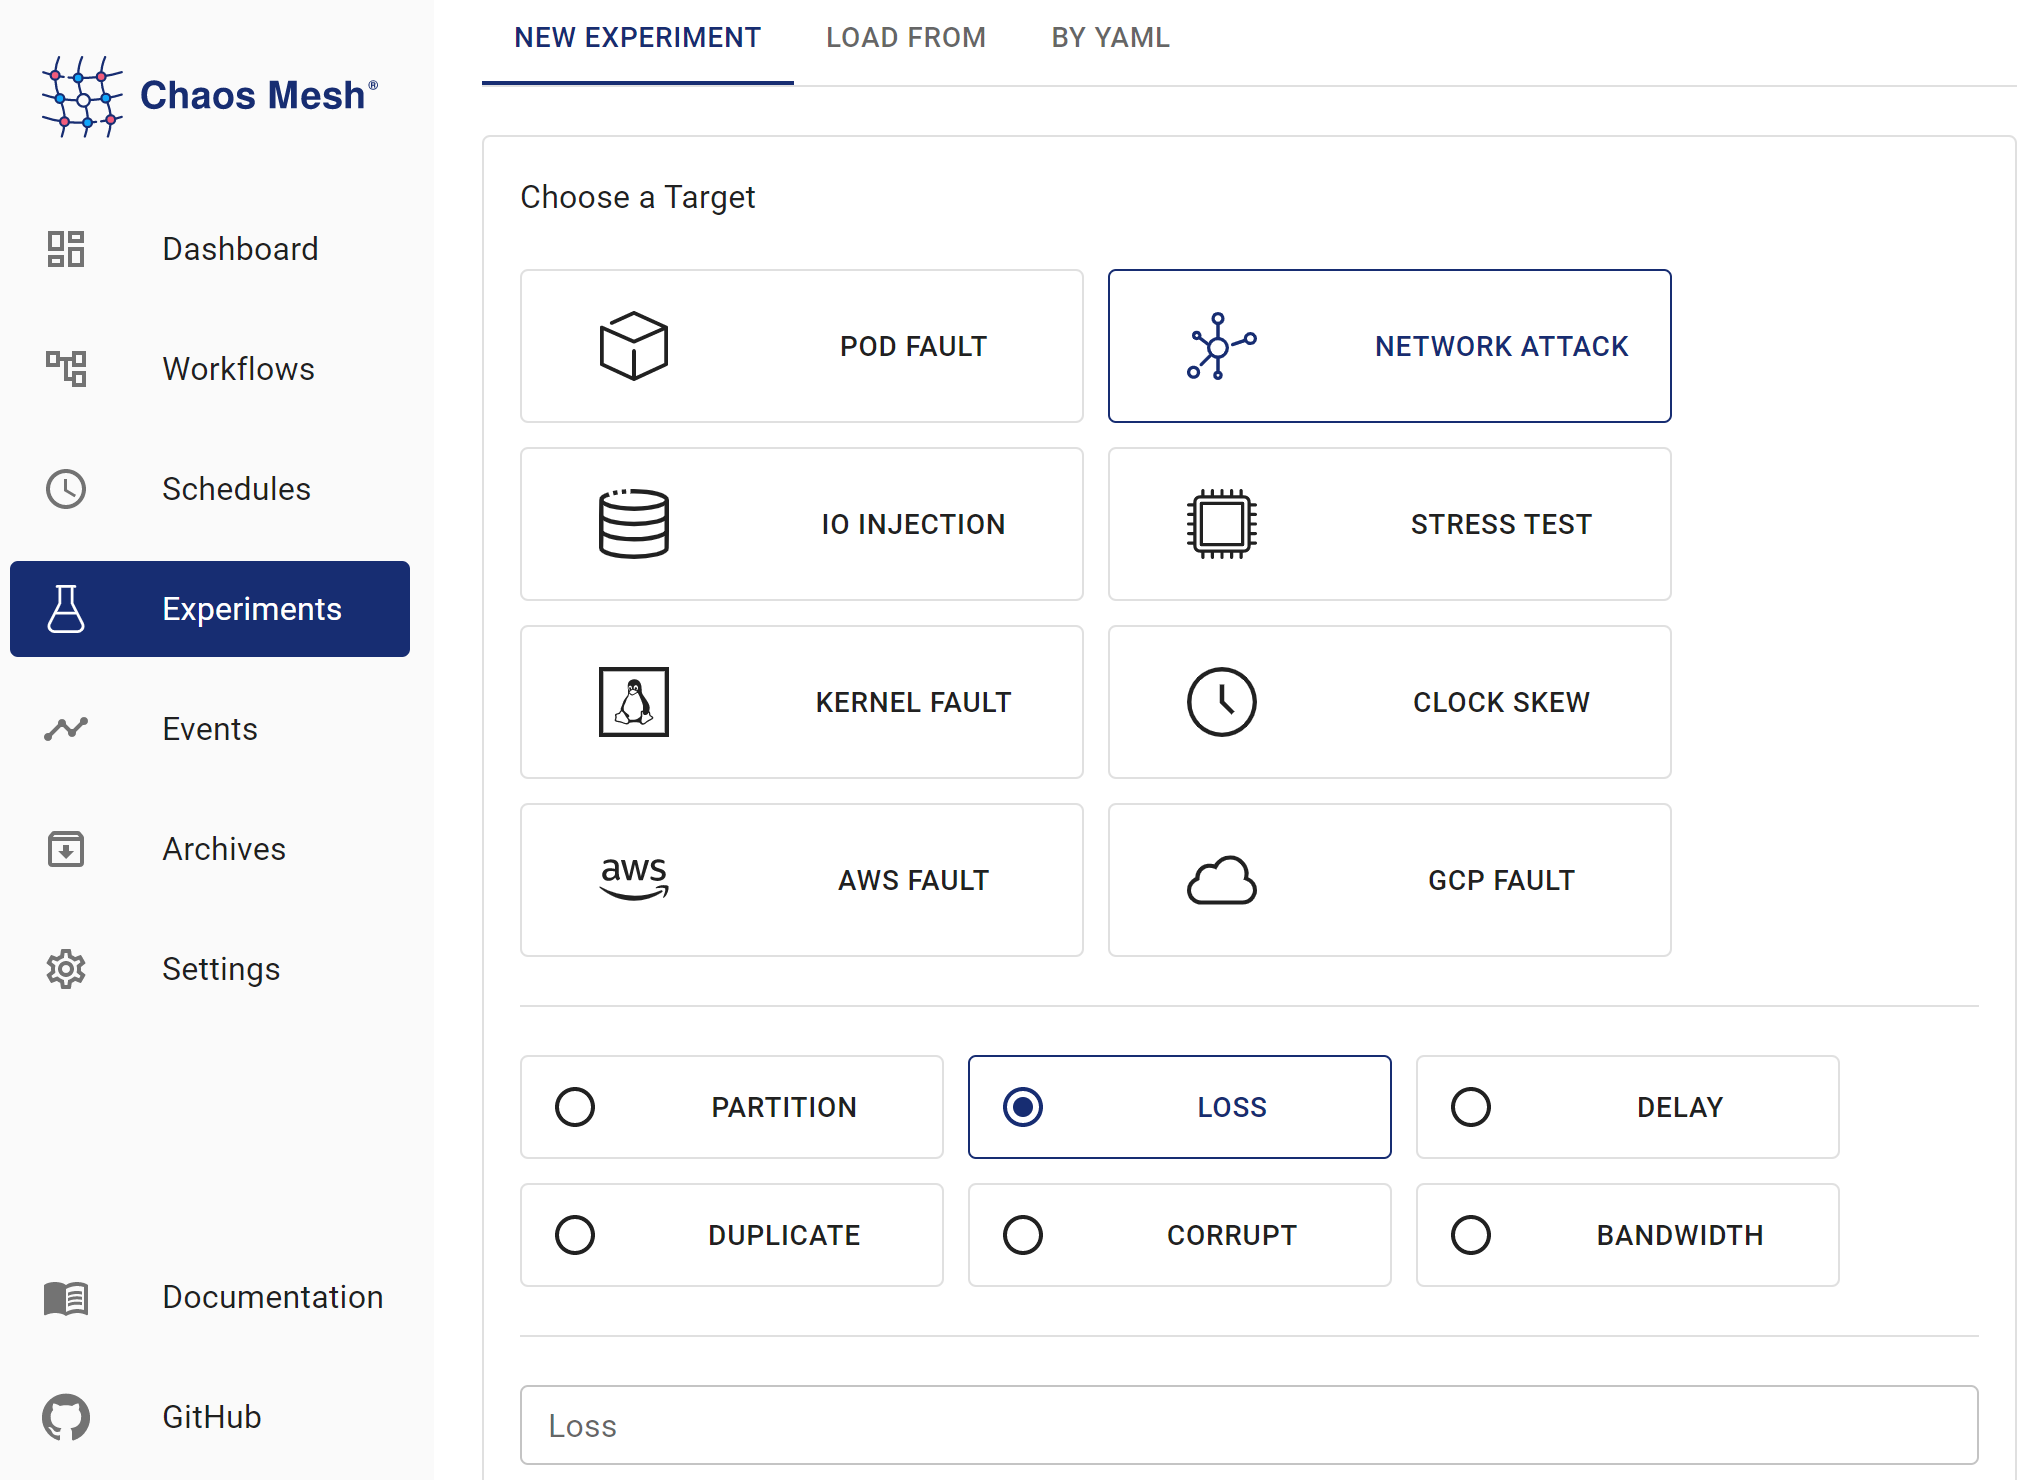
NetworkChaos Experiments Details zu den Konfigurationsfeldern finden Sie unter Feldbeschreibung.
-
Geben Sie die Experimentinformationen ein und legen Sie den Experimentumfang sowie die geplante Laufzeit fest.
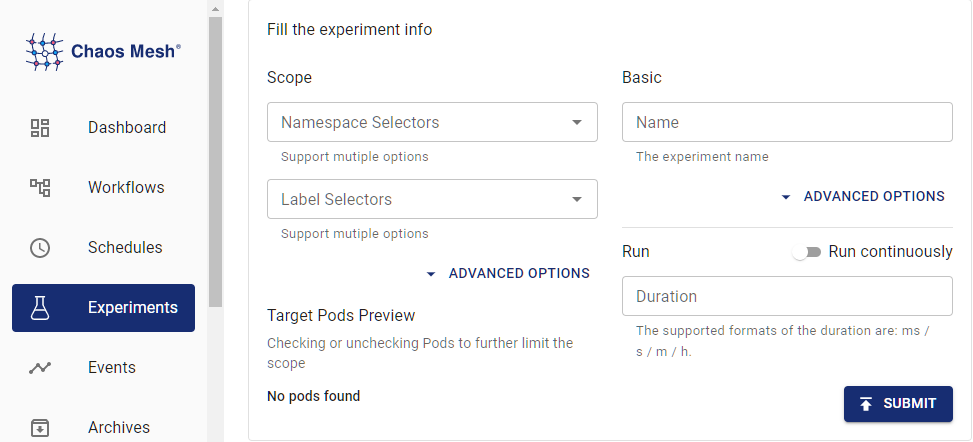
Experiment Information -
Übermitteln Sie die Experimentinformationen.
Experimente mit YAML-Dateien erstellen
Verzögerungsbeispiel
-
Schreiben Sie die Experimentkonfiguration in die Datei
network-delay.yaml, wie unten gezeigt:apiVersion: chaos-mesh.org/v1alpha1
kind: NetworkChaos
metadata:
name: delay
spec:
action: delay
mode: one
selector:
namespaces:
- default
labelSelectors:
'app': 'web-show'
delay:
latency: '10ms'
correlation: '100'
jitter: '0ms'Diese Konfiguration verursacht eine Latenz von 10 Millisekunden in den Netzwerkverbindungen der Ziel-Pods. Zusätzlich zur Latenzinjektion unterstützt Chaos Mesh auch Paketverlust und Paketumordnung. Details finden Sie unter Feldbeschreibung.
-
Nachdem die Konfigurationsdatei vorbereitet ist, erstellen Sie das Experiment mit
kubectl:kubectl apply -f ./network-delay.yaml
Partitionierungsbeispiel
-
Schreiben Sie die Experimentkonfiguration in die Datei
network-partition.yaml, wie unten gezeigt:apiVersion: chaos-mesh.org/v1alpha1
kind: NetworkChaos
metadata:
name: partition
spec:
action: partition
mode: all
selector:
namespaces:
- default
labelSelectors:
'app': 'app1'
direction: to
target:
mode: all
selector:
namespaces:
- default
labelSelectors:
'app': 'app2'Diese Konfiguration blockiert Verbindungen von
app1zuapp2. Der Wert für das Felddirectionkannto,fromoderbothsein. Details finden Sie unter Feldbeschreibung. -
Nachdem die Konfigurationsdatei vorbereitet ist, erstellen Sie das Experiment mit
kubectl:kubectl apply -f ./network-partition.yaml
Bandbreitenbeispiel
-
Schreiben Sie die Experimentkonfiguration in die Datei
network-bandwidth.yaml, wie unten gezeigt:apiVersion: chaos-mesh.org/v1alpha1
kind: NetworkChaos
metadata:
name: bandwidth
spec:
action: bandwidth
mode: all
selector:
namespaces:
- default
labelSelectors:
'app': 'app1'
bandwidth:
rate: '1mbps'
limit: 20971520
buffer: 10000Diese Konfiguration begrenzt die Bandbreite von
app1auf 1 Mbps. -
Nachdem die Konfigurationsdatei vorbereitet ist, verwenden Sie
kubectl, um das Experiment zu erstellen:kubectl apply -f ./network-bandwidth.yaml
Beispiel für Netzwerkemulation
-
Schreiben Sie die Experimentkonfiguration in die Datei
netem.yaml, wie unten gezeigt:apiVersion: chaos-mesh.org/v1alpha1
kind: NetworkChaos
metadata:
name: network-emulation
spec:
action: netem
mode: all
selector:
namespaces:
- default
labelSelectors:
'app': 'web-show'
delay:
latency: '10ms'
correlation: '100'
jitter: '0ms'
rate:
rate: '10mbps'Diese Konfiguration verursacht eine Latenz von 10 Millisekunden und eine Bandbreitenbegrenzung von 10 Mbps in den Netzwerkverbindungen der Ziel-Pods. Neben Latenz und Bandbreite unterstützt die
netem-Aktion auch Paketverlust, Neuordnung und Beschädigung. -
Nachdem die Konfigurationsdatei vorbereitet ist, verwenden Sie
kubectl, um das Experiment zu erstellen:kubectl apply -f ./netem.yaml
Feldbeschreibung
| Parameter | Type | Description | Default value | Required | Example |
|---|---|---|---|---|---|
| action | string | Indicates the specific fault type. Available types include: netem, delay (network delay), loss (packet loss), duplicate (packet duplicating), corrupt (packet corrupt), partition (network partition), and bandwidth (network bandwidth limit). After you specify action field, refer to Description for action-related fields for other necessary field configuration. | None | Yes | Partition |
| target | Selector | Used in combination with direction, making Chaos only effective for some packets. | None | No | |
| direction | enum | Indicates the direction of target packets. Available values include from (the packets from target), to (the packets to target), and both ( the packets from or to target). This parameter makes Chaos only take effect for a specific direction of packets. | to | No | both |
| mode | string | Specifies the mode of the experiment. The mode options include one (selecting a random Pod), all (selecting all eligible Pods), fixed (selecting a specified number of eligible Pods), fixed-percent (selecting a specified percentage of Pods from the eligible Pods), and random-max-percent (selecting the maximum percentage of Pods from the eligible Pods). | None | Yes | one |
| value | string | Provides a parameter for the mode configuration, depending on mode. For example, when mode is set to fixed-percent, value specifies the percentage of Pods. | None | No | 1 |
| selector | struct | Specifies the target Pod. For details, refer to Define the experiment scope. | None | Yes | |
| externalTargets | []string | Indicates the network targets except for Kubernetes, which can be IPv4 addresses or domains. This parameter only works with direction: to. | None | No | 1.1.1.1, google.com |
| device | string | Specifies the affected network interface | None | No | "eth0" |
Beschreibung der action-bezogenen Felder
Für die Fehlertypen Netzwerkemulation und Bandbreite können Sie die action-bezogenen Parameter gemäß der folgenden Beschreibung weiter konfigurieren.
-
Netzwerkemulationstyp:
delay,loss,duplicated,corrupt,rate -
Bandbreitentyp:
bandwidth
delay
Wenn Sie action auf delay setzen, simulieren Sie Netzwerklatenzfehler. Sie können folgende Parameter konfigurieren.
| Parameter | Type | Description | Required | Required | Example |
|---|---|---|---|---|---|
| latency | string | Indicates the network latency | No | No | 2ms |
| correlation | string | Indicates the correlation between the current latency and the previous one. Range of value: [0, 100] | No | No | 50 |
| jitter | string | Indicates the range of the network latency | No | No | 1ms |
| reorder | Reorder(#Reorder) | Indicates the status of network packet reordering | No |
Das Berechnungsmodell für correlation ist wie folgt:
-
Generieren Sie eine Zufallszahl, deren Verteilung mit dem vorherigen Wert korreliert:
rnd = value * (1-corr) + last_rnd * corrrndist die Zufallszahl.corrist die von Ihnen festgelegtecorrelation. -
Verwenden Sie diese Zufallszahl, um die Verzögerung des aktuellen Pakets zu bestimmen:
((rnd % (2 * sigma)) + mu) - sigmaIn der obigen Formel entspricht
sigmademjitterundmuderlatency.
reorder
Wenn Sie action auf reorder setzen, simulieren Sie Paketreihenfolgefehler im Netzwerk. Sie können folgende Parameter konfigurieren.
| Parameter | Type | Description | Default value | Required | Example |
|---|---|---|---|---|---|
| reorder | string | Indicates the probability to reorder | 0 | No | 0.5 |
| correlation | string | Indicates the correlation between this time's length of delay time and the previous time's length of delay time. Range of value: [0, 100] | 0 | No | 50 |
| gap | int | Indicates the gap before and after packet reordering | 0 | No | 5 |
loss
Wenn Sie action auf loss setzen, simulieren Sie Paketverlustfehler. Sie können folgende Parameter konfigurieren.
| Parameter | Type | Description | Default value | Required | Example |
|---|---|---|---|---|---|
| loss | string | Indicates the probability of packet loss. Range of value: [0, 100] | 0 | No | 50 |
| correlation | string | Indicates the correlation between the probability of current packet loss and the previous time's packet loss. Range of value: [0, 100] | 0 | No | 50 |
duplicate
Setzen Sie action auf duplicate, um Paketduplizierung zu simulieren. Dabei können Sie folgende Parameter festlegen.
| Parameter | Type | Description | Default value | Required | Example |
|---|---|---|---|---|---|
| duplicate | string | Indicates the probability of packet duplicating. Range of value: [0, 100] | 0 | No | 50 |
| correlation | string | Indicates the correlation between the probability of current packet duplicating and the previous time's packet duplicating. Range of value: [0, 100] | 0 | No | 50 |
corrupt
Wenn Sie action auf corrupt setzen, simulieren Sie Paketbeschädigungsfehler. Sie können folgende Parameter konfigurieren.
| Parameter | Type | Description | Default value | Required | Example |
|---|---|---|---|---|---|
| corrupt | string | Indicates the probability of packet corruption. Range of value: [0, 100] | 0 | No | 50 |
| correlation | string | Indicates the correlation between the probability of current packet corruption and the previous time's packet corruption. Range of value: [0, 100] | 0 | No | 50 |
Für sporadische Ereignisse wie reorder, loss, duplicate und corrupt ist die correlation komplexer. Eine detaillierte Modellbeschreibung finden Sie unter NetemCLG.
rate
Wenn Sie action auf rate setzen, wird eine Bandbreitenraten-Störung simuliert. Diese Aktion ähnelt bandwidth/rate, der entscheidende Unterschied ist jedoch, dass sie mit anderen oben aufgeführten netem-Aktionen kombiniert werden kann. Wenn Sie jedoch mehr Kontrolle über die Bandbreitensimulation benötigen (z.B. Begrenzung der Puffergröße), verwenden Sie stattdessen die bandwidth-Aktion.
| Parameter | Type | Description | Default value | Required | Example |
|---|---|---|---|---|---|
| rate | string | Indicates the rate of bandwidth limit. Allows bit, kbit, mbit, gbit, tbit, bps, kbps, mbps, gbps, tbps unit. bps means bytes per second | Yes | 1mbps |
bandwidth
Wenn Sie action auf bandwidth setzen, wird eine Bandbreitenbegrenzungs-Störung simuliert. Sie müssen zusätzlich folgende Parameter konfigurieren.
Diese Aktion schließt sich gegenseitig mit allen oben definierten netem-Aktionen aus. Wenn Sie Bandbreitenraten zusammen mit anderen Netzwerkfehlern wie Korruption injizieren müssen, verwenden Sie stattdessen die rate-Aktion.
| Parameter | Type | Description | Default value | Required | Example |
|---|---|---|---|---|---|
| rate | string | Indicates the rate of bandwidth limit. Allows bit, kbit, mbit, gbit, tbit, bps, kbps, mbps, gbps, tbps unit. bps means bytes per second | Yes | 1mbps | |
| limit | uint32 | Indicates the number of bytes waiting in queue | Yes | 1 | |
| buffer | uint32 | Indicates the maximum number of bytes that can be sent instantaneously | Yes | 1 | |
| peakrate | uint64 | Indicates the maximum consumption of bucket (usually not set) | No | 1 | |
| minburst | uint32 | Indicates the size of peakrate bucket (usually not set) | No | 1 |
Weitere Details zu diesen Feldern finden Sie im tc-tbf-Dokument. Es wird empfohlen, limit auf mindestens 2 * rate * latency zu setzen, wobei latency die geschätzte Latenz zwischen Quelle und Ziel ist und über den ping-Befehl ermittelt werden kann. Ein zu kleiner limit-Wert kann zu hoher Paketverlustrate führen und den TCP-Durchsatz beeinträchtigen.